
API - MQTT
Every unicontrol device is equipped with an MQTT protocol serving for a daily communication with the device. Unlike HTTP , MQTT API is not capable of granting full control over the system or process settings. Its designation is limited to:
- Obtaining sensor readings and output states
- Accessing basic process settings, especially times and thresholds
- Sending basic commands
The necessary prerequisite for using the MQTT API is active and stable connection to an MQTT broker. In choosing one, the user can choose from the following two main options:
- Hosting own broker - this itself contains a wide variety of options ranging from having a microcomputer like
Raspberry PIconnected to your local area network, to reserving capacity on a professional online server. - Using external service - there is a plenty of ready-to-use online MQTT brokers ranging from free to industrial grade services.
A unicontrol device may connect to all the options contained above. Whatever the final broker choice, all necessary connection details can be provided on the Wireless set-up page. You may also want to check our MQTT connection tutorial for a practical quide and examples.
MQTT Message
The main unit of the MQTT exchange is a message consisting of the Payload carrying the data and the Topic carrying the context.
While the Payload of the unicontrol MQTT messages only contain a simple numeric, logical or time value,
Topic of those messages is crucial for addressing the right subject of the right process of the right device.
JSON form.Addressing the device
The first task is to identify the device to communicate with. This purpose is served by setting up the first three levels of the MQTT message topic accessible in the Wireless set-up page. The user may define each of the first three topic levels there. Each may be up to 25 characters long and the first one must not be empty.
UTF-8-compatible characters other than + , # (wildcards) or / (separator).- Topic Level 1 is compulsory and serves mainly to identify the user. It is a good practice to set it equal to the broker account user name, or any unique string assigned to this account.
- Topic Level 2 is optional and is intended to identify the place of duty or designation. It is a good practice to briefly describe the device's location here.
- Topic Level 3 is optional and is intended to unambiguously identify the device in case of a larger concentration of devices is used in a single location. It is a good practice to set it equal to the device Name.

By adding another level flagging the message direction - pub for outbound and sub for inbound message from the device perspective -
we arrive at the pub/sub Topic roots representing the main basis for the two-way communication with the device. All messages sent by the device then have their topics starting with:
[Topic L1] / [Topic L2]* / [Topic L3]* /pub/
, just as all messages accepted by the device must have topics starting with:
[Topic L1] / [Topic L2]* / [Topic L3]* /sub/
Finally, as long as the Subscription is enabled, the device is automatically subscribed to receive all messages satisfying following topic rule:
[Topic L1] / [Topic L2]* / [Topic L3]* /sub/#
Similarly, the user may receive all messages published by the device by subscribing to:
[Topic L1] / [Topic L2]* / [Topic L3]* /pub/#
# is a wildcard meaning any valid continuation of the topic. Please check the MQTT protocol for more details.IoT MQTT Panel will let you define a dashboard prefix which is automatically added to each individual panel.
Setting it equal to the Topic root (with or without
pub/, sub/ or [PROCESS ID]/)
may save a significant effort when setting up your personalised dashboard.Addressing the process
Once the device is identified by the Topic roots, adding another level with properly defined [PROCESS ID] will target the specific process within the given device:
[Topic L1] / [Topic L2]* / [Topic L3]* /sub/ [PROCESS ID]
[Topic L1] / [Topic L2]* / [Topic L3]* /pub/ [PROCESS ID]
This addressing can be done in two-ways: the [PROCESS ID] placeholder can be replaced either by the respective process' Name or its index number with the prefix "process_".
For the inbound messages both options can be used equivalently at the same time as long as the processes' Names are defined unambiguously.
For the outbound telemetry messages the user needs to specify the preferred option separately for publishing Input and Output.
"process_5" is possible, but addressing it this way will cause the software to operate with the process #5 instead.Addressing the subject
Once the required Device and Process are identified, the remaining topic levels will address the desired subject of the MQTT message. These can be divided into 3 main groups as detailed out in the following sections:
- Telemetry - sensor readings and output states
- Parameters - basic process settings, especially times and thresholds
- Commands - basic executable instructions
Telemetry
To receive the required telemetry data as a payload, the user needs to subscribe to messages with the following topic:
[Topic L1] / [Topic L2]* / [Topic L3]* /pub/ [PROCESS ID] / [TELEMETRY]
All telemetry messages are sent with Retain = true and QoS = 0.
For detailed reference on the message Payload and topic's [TELEMETRY] please consult the table below:
| [TELEMETRY] | Payload | Note |
|---|---|---|
input | numeric reading | If allowed, reading of the respective process is being regularly published as a raw, unit-less number. |
output | "0" - Off, or "1" - On | If allowed, "0" or "1" is being published when the respective process' output changes state once as the process state and once as a peripheral state. Value is not affected by the output Inversion. |
Peripheral message
If [TELEMETRY] = output, the original (process) message is followed by another Peripheral message which is otherwise identical to the original one, but the value is now affected by the output Inversion and has the Topic altered as follows:
[Topic L1] / [Topic L2]* / [Topic L3]* /pub/ [OUTPUT LABEL] / output
The [OUTPUT LABEL] represents the label of the Output selected within the relevant process.
Minimal option is selected for the MQTT connection.Technical messages
Several technical messages are automatically published 30 seconds after a successful connection to an MQTT broker and then repeatedly every 5 minutes for the entire duration of the session:
Minimal option is selected for the MQTT connection, the technical messages are only sent once upon establishing connection with the broker and are not repeated afterwards.- Connection status - with the
Payloadequal to1and the following topic:
[Topic L1]/[Topic L2]*/[Topic L3]*/pub/conn * if non-emptyAt the same time, a Testament message is saved within the broker using the same topic and
Payloadequal to0.The Testament (i.e., Will, or Last Will) message is automatically delivered to all subscribed clients up to 30 seconds after the device's connection with the broker is lost. - IP address - with the latest local network IPv4 address as
Payloadand the topic as follows:
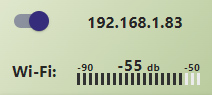
[Topic L1]/[Topic L2]*/[Topic L3]*/pub/ip * if non-empty - Wi-Fi RSSI - with the Wi-Fi signal strength (RSSI) as
Payloadand the topic as follows:
[Topic L1]/[Topic L2]*/[Topic L3]*/pub/rssi * if non-empty
Parameters
To set or change the selected process parameter,
publish the message with the new value as a payload and the following topic:
[Topic L1] / [Topic L2]* / [Topic L3]* /sub/ [PROCESS ID] / [PARAMETER]
Sending the message with Retain = true will allow to keep the respective parameter updates in real time throughout all devices connected to the given topic.
For detailed reference on the message Payload and topic's [PARAMETER] please consult the table below:
| [PARAMETER] | Variable | Payload | Note |
|---|---|---|---|
mstr | Main state | 0 for OFF, or 1 for Auto, or 2 for ON, or 3 for Inactive | Changes the main state of the process. |
tfrom1 | Process timer | HH:MM in 24h format (HH:MM:SS also accepted, although seconds are ignored) | Start times of the respective process timer periods. |
tfrom2 | |||
tfrom3 | |||
tfrom4 | |||
tto1 | End times of the respective process timer periods. | ||
tto2 | |||
tto3 | |||
tto4 | |||
d1 | 0 or False for disabled or 1 or True for enabled | Disables or enables individual days of the process timer, where d1 represents Monday etc. | |
d2 | |||
d3 | |||
d4 | |||
d5 | |||
d6 | |||
d7 | |||
inval1 | High/Low input or Condition test value | integer between -9999 and 9999 | Defines the lower bound of the input range for the Analog link or the On Condition thresholds, depending on the set-up in the On Event. |
inval2 | Defines the upper bound of the input range for the Analog link or the Off Condition thresholds, depending on the set-up in the On Event. | ||
outval1 | High/Low output or Mem value or RGB Speed* | integer between 0 and 100 |
Depending on the On Event and Output setup, this value may define: i) the lower bound of the input range for the Analog link, ii) the Mem value to be set, added to, or deducted from the selected memory slot, or iii)* the RGB program's Speed. |
outval2 | High/Low output or Duty cycle or RGB Brightness* |
Depending on the On Event and Output setup, this value may define: i) the upper bound of the input range for the Analog link, ii) the PWM Duty cycle of the analog output, or iii)* the RGB program's relative Brightness. | |
ontout | Idle/Running time | integer between 0 and 255 | Defines the number of time units for which the output is ON or OFF, respectively, before it is automatically turned OFF or ON, respectively. Only relevant for the Timeout switching Event |
offtout |
Special variables
To set or change the selected special parameter, publish the message with the new value as a payload and the following topic:
[Topic L1] / [Topic L2]* / [Topic L3]* /pub/ [PARAMETER]
Sending the message with Retain = true will allow to keep the respective parameter updates in real time throughout all devices connected to the given topic.
For detailed reference on the message Payload and topic's [PARAMETER] please consult the table below:
| [PARAMETER] | Boot value | Variable | [VALUE] | Note |
|---|---|---|---|---|
rgbmod1rgbmod2 |
0 | RGB Mode | integer between 0 and 9. |
Mode of the RGB driver's currently active program. |
rgbcolor1rgbcolor2 |
#99CC00 | RGB Color | standard 6-digit (non-abbreviated) RGB hex code #RRGGBB (web color) |
Color of the RGB driver's currently active program. |
rgbspd1rgbspd2 |
100 | RGB Speed | integer between 0 and 100. |
Speed of the RGB driver's currently active program. |
rgbbrt1rgbbrt2 |
RGB Brightness | Brightness of the RGB driver's currently active program. |
** Parameters
rgbmod, rgbcolor, rgbspd, and rgbbrt have become obsolete as of the version 1.14, replaced by channel-specific parameters
rgbmod1, rgbcolor1, rgbspd1, rgbbrt1, rgbmod2, rgbcolor2, rgbspd2, and rgbbrt2, respectively.
Commands
To execute the selected command, publish the message with the following topic:
[Topic L1] / [Topic L2]* / [Topic L3]* /pub/ [PROCESS ID] / [COMMAND]
[PROCESS ID] topic level may be omitted for the Reboot command.Retain = false as otherwise the command will be executed after every subscription to the MQTT.
Please note that the retained messages can only be overwritten with a new payload, but not withdrawn or deleted.
This makes retain useful for sensor readings, but undesirable for one-off commands.For detailed reference on the message Payload and topic's [COMMAND] please consult the table below:
| [COMMAND] | Payload | Note |
|---|---|---|
reboot | - | Reboots the device. |
outset | "0" - Off, or "1" - On | Simulates the On/Off button and sets the output of the flagged process On or Off one time, but does not override subsequent changes initiated by the process(-es). Obeys the Inversion |